Cloudflare R2: A new era of object storage
Store large amounts of unstructured data without the costly egress bandwidth fees associated with typical cloud storage services.
Get started with R2 in four steps.
Step 1. Install and authenticate Wrangler
Install Wrangler within your project using npm and Node.js or Yarn.

Step 2. Authenticate Wrangler to enable deployments to Cloudflare.
When Wrangler automatically opens your browser to display Cloudflare’s consent screen, select Allow to send the API Token to Wrangler.

Step 3. Create a bucket
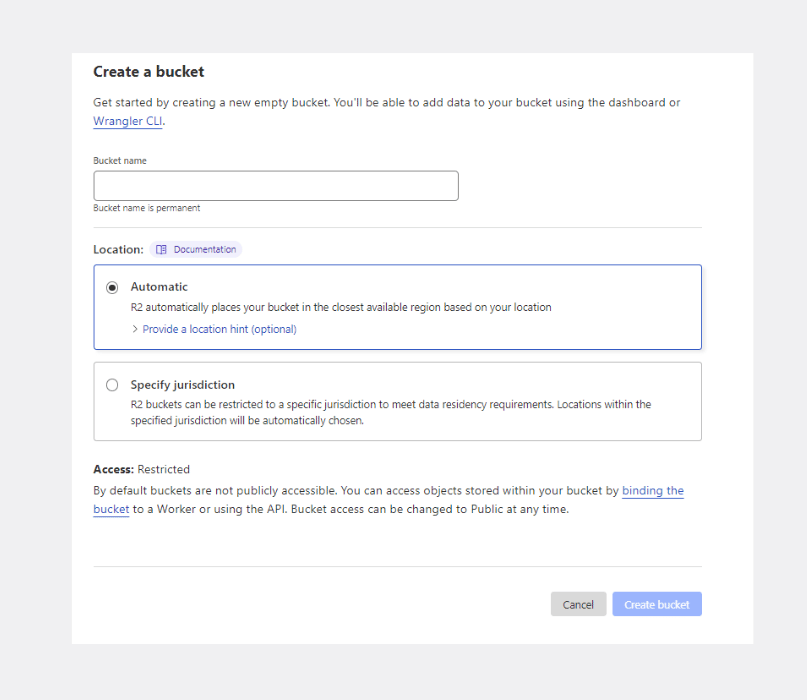
From the R2 page in the dashboard, select Create bucket. Enter a name for the bucket and select Create bucket.
- Log in to the Cloudflare dashboard and select R2.
- Select Create bucket.
- Enter a name for the bucket and select Create bucket.
Step 4. Upload your first object
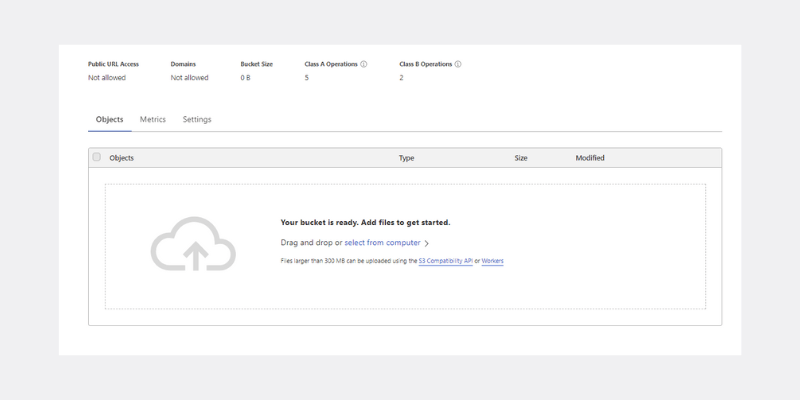
- From the R2 page in the dashboard, locate and select your bucket.
- Select Upload.
- Choose to either drag and drop your file into the upload area or select from computer.
You will receive a confirmation message after a successful upload.
View applications built using R2 object storage
Resources
Learn how to use R2 Public Buckets, a storage service that allows you to store and serve static assets such as images and documents.
Integrate R2 storage into your applications using Cloudflare's Workers API and Wrangler, a command-line tool for building and deploying Cloudflare Workers.
Get a closer look at how R2 implements the S3 API, allowing users to migrate their applications and data from AWS S3 seamlessly while retaining full compatibility with the S3 API. We'll also provide an example of how to configure the aws-sdk-js-v3 for R2.
Cloudflare powers millions of Internet properties